
Would you like to learn how to glaze pottery? Glazing is a massive topic but can be a very rewarding part of your pottery making process. Read on to learn all the most important info about choosing, mixing, applying, and firing glaze for pottery.

Some of the links below are affiliate links. If you make a purchase by clicking on one of the links, I get a small percent of the sale with no extra cost to you.
What is Pottery Glaze?
Glazing pottery is the process of adding a thin glass like layer to ceramic objects that are made out of clay. This thin layer not only enhances the aesthetic appeal of the pottery but also serves important functional purposes. Many potters consider glazing an art form in itself.
Why Glazing Ceramics is Important
Though some potters create pots without glaze, glazing pottery has a number of benefits. Some advantages to glazing ceramics include:
- Protection: Glazing protects pottery from moisture and contaminants, making it safer for everyday use.
- Durability: A properly applied glaze that fits the chosen clay increases the strength of ceramic pieces, making them less likely to chip or crack over time.
- Aesthetic Appeal: Glazes come in a wide variety of colors, textures, and finishes. Potters can use glazes to express creativity and craftsmanship in unique ways as they decorate their pots.
- Functional Properties: Certain glazes can provide non-stick surfaces, making clean-up easier when using functional ware. Glazes are considered food safe if they do not leach contaminants into food or beverage and create a defect free surface.
In essence, pottery glazing adds value, both in form and function. Finding the right balance between all these benefits can really add depth and uniqueness to your pots.
Basic Types of Glazes
If you have any experience glazing pottery you probably quickly realized that not all glazes are the same.

Each glaze has its own unique characteristics and applications, offering potters a range of opportunities to experiment. Here are some of the most common classifications of glazes:
- Glossy Glaze: This type creates a shiny, smooth surface that enhances the brightness of colors. They are great for functional pottery.
- Matte Glaze: Offering a softer finish, matte glazes can come in a range of surfaces such as satin, semi-matte, and heavy matte. The crystal structure that creates some of these surfaces can really add some interest. They are great for a rustic or contemporary look.
- Transparent Glaze: As the name suggests, transparent glazes allow the clay body or underglaze decoration to show through, making them ideal for highlighting intricate designs and texture.
- Opaque Glaze: This glaze completely covers the surface, hiding any color underneath. It’s perfect for achieving a solid color. Glazes can fall anywhere in between these ranges as well. For instance some glazes are translucent, some are semi-opaque, etc.
- Commercial Glaze: You can purchase premixed commercial glazes at any ceramic supply store and some art stores. They often come in pint size or 4 oz. jars or by the pound of dry powder. These glazes are already mixed for you and offer reliable results.
- Mix Your Own Glaze: Glaze ingredients can be purchased in powder form and mixed according to recipes found in books, magazines or online.
See more / buy at Amazon (affiliate links).


Components of Pottery Glaze
Understanding what goes into a glaze can greatly improve how potters create and troubleshoot their glazes. The primary components of a glaze include:
- Silica: The backbone of any glaze, silica creates the glassy surface.
- Flux: These materials lower the melting temperature of silica, helping it form glass. Common fluxes include feldspar, frits, sodium and potassium.
- Alumina: This adds stability to the glaze and helps prevent it from running off the pot during firing.
- Colorants: As the name implies, these are often added to a base glaze to provide a certain color. Examples include iron, copper, and cobalt.
- Opacifiers: These ingredients are used to make a glaze more opaque. Examples include Rutile, Titanium Dioxide, Tin, and Zircopax.
These special pottery supplies can be found in a broad range of powdered ingredients from a number of pottery suppliers. Balancing these ingredients in different ways can create nearly limitless possibilities for glaze surface, color, and effects. If you mix your own glaze from raw ingredients you can make adjustments and experiment with these different components to see what kind of results are possible.
Preparing for Glazing Pottery
How to choose the Right Glaze for Your Pottery
With so many choices, it would be easy to get overwhelmed. But here are some tips to help you choose the right pottery glaze.
Consider the Clay
Choosing the right glaze for your pottery project starts with understanding the clay you are using to make pottery. Glazes are formulated to be fired at specific temperatures. Clays are also formulated to be fired in a specific range of temperatures. To get the best results make sure your glazes match the firing range of your clay. For example, if you are using low fire clay, make sure to use low fire glazes for best results.

The color of the clay can also impact the glaze. Glazes will often look brighter on lighter colored clays. Some glazes will gain some extra depth with a darker clay showing through.

You should also make sure your glazes fit the clay body. Clays and glazes have different amounts of expansion when fired. If a glaze doesn’t have a similar coefficient of expansion as the clay, the glaze may develop faults or defects. Commercial glazes are formulated to fit the same name brand of clays and most clay bodies in the same firing range.
Think About Your Surface
Finally, consider the finish you want for your pottery. Glazes come in various finishes, including matte, glossy, and satin. Each finish creates a different aesthetic and will affect the final look of your piece. There are also glazes that provide special effects such as crawling, crazing, and crystals.
Preparing Pottery Pieces
Before starting the glazing process, it’s essential to prepare your pottery pieces properly. This preparation can significantly impact the final outcome of your glazes.

Here are a few steps to consider:
- Bisque Firing: Ensure the pottery has undergone the first firing (bisque firing), as this transforms clay into a durable, porous state, ready to accept the glaze.
- Cleaning: Remove any dust, fingerprints, or old glaze residues. A damp sponge or cloth works well. Some potters use compressed air. Some potters just make a quick visual check. A clean surface allows the glaze to adhere properly.
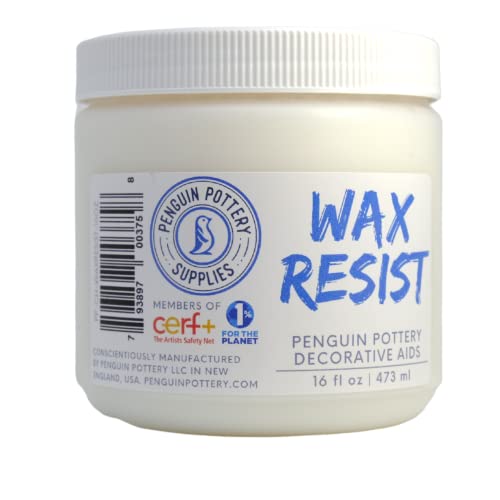
- Applying Resist: If there is part of the pot where you do not want glaze, apply some kind of resist. Wax resist is used by many potters, especially at the bottom of their pots that rest on the kiln shelf during firing. The wax resist repels the glaze and makes it easier to wipe off. Latex resist, tape, paper and other materials can be used for design purposes to keep glaze from covering an area of a pot.
- Underglaze: underglaze or other decorations can be added before glazing to give a unique design or depth to the surface.
- Prepare the Glaze: Mix the glaze well. Glaze can be run through an 80 mesh sieve to make sure there are no clumps. This is especially important if the glaze has just been mixed or it is old. Some potters sieve their glazes before every application.
See more / buy at Amazon (affiliate links).


Setting Up Your Glazing Area
Creating a productive workspace is just as crucial as preparing your pottery. A well-organized area can help streamline the glazing process. Here are some steps to set up a great glaze space:
- Choose a Suitable Work Surface: Select a sturdy table that can handle spills and messes. A surface covered with plastic makes cleanup easy.
- Organize Tools and Materials: Keep your brushes, sponges, and spray bottles within reach. Consider using trays or bins to hold glazes and tools.
- Ensure Good Ventilation: If you’re working with sprays or any potentially hazardous materials, make sure your workspace is well-ventilated.
- Room for Pots: You will most likely be glazing multiple pots in one session. Make sure you have enough space to move pots around, glaze them, and let them dry.
In my pottery studio, I always have a couple damp sponges available to wipe up a drip, clean off the bottom of a pot, or clean off my hands.

Glaze is much easier to clean while it is wet and then you don’t have to worry about getting it on additional surfaces.
Techniques for Applying Glaze to Pottery
Once your pottery pieces are ready, it’s time to apply the glaze! You know the old saying: there is more than one way to glaze a pot. Let’s consider some of the most popular.
Brushing Glaze on Pottery
Brushing is a classic and straightforward way to glaze pottery that many potters use to great effect. The liquid glaze is painted onto the surface of the pot using a paintbrush. Most commercial glazes require three coats of glaze to achieve the desired effect. If you mix your own glaze you can adjust the consistency of the glaze and add certain substances to make it easier to brush.

Here are some tips for effective brushing:
- Choose the Right Brush: A soft, flat brush works well for wide areas, while a smaller round brush is great for details and edges.
- Apply Evenly: Make sure to load your brush with glaze and apply it in smooth, even strokes. Multiple thin coats often yield better results than one thick coat. Use a light touch to avoid brush marks. Brushing in different directions helps too. For example, if you brush the first layer vertically, brush the next layer horizontally.
- Drying Time: Let each layer of glaze dry completely before adding another layer on top. Each subsequent layer may take longer to dry than the last.
Dipping Glaze
Dipping pots into glaze is much more efficient and can provide a beautifully uniform finish, making it one of the more popular methods among potters.

Here’s how to get started:
- Make Enough Glaze: Dipping glaze will require much more glaze than brushing glaze. Ideally, the whole pot should fit down into the glaze at one time. It is also possible to submerge half the pot at a time, even changing to another color for the other half. Many potters mix each glaze in a 5 gallon bucket.
- Prepare Your Glaze: Ensure your glaze is at the right consistency—too thick or too thin can affect the outcome. Make sure it is mixed well. Some glazes may even require mixing after just a few pots if the ingredients start to settle to the bottom of the bucket of glaze. You can also flocculate or deflocculate your glaze to get the application that you want.
- Dip Carefully: Submerge the piece into the glaze evenly. Hold it for a few seconds to let it absorb the glaze before lifting it out. Depending on your clay, glaze consistency, and the effect you want, you may need to hold the pot in the glaze more or less time. If you are glazing the whole piece at one time, you can use glaze tongs to hold onto the pot.
- Clean Off Excess Glaze: Let extra glaze run off the pot and back into the bucket. Wipe off the bottom of your pot with a damp sponge to make the bottom clean. Carefully set the piece aside to dry.
See more / buy at Amazon (affiliate links).


Pouring Glaze
Pouring glaze onto pottery is also an efficient application technique. It takes a little more practice to master but works especially well for the interior of pots. Pouring glaze often creates more splashes and drips.

Here are some tips for pouring glaze:
- Make Enough Glaze: Pouring glaze doesn’t always require as much glaze as dipping, especially if you are applying it to the inside of a pot. But you want enough to cover the surface in one pour. Trying to re-pour the glaze can cause some uneven spots and possibly some unwanted effects. The interior of a piece doesn’t require a lot of glaze. It can be poured in and rolled around inside to cover the inside walls.
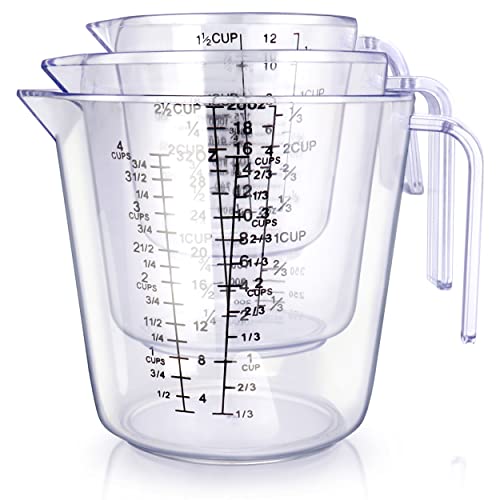
- Use a Good Pouring Vessel: Find something that is easy to hold and pours smoothly. Small enough to hold with one hand but large enough to hold enough glaze to cover the surface of your pot. A liquid measuring cup may be a good option.
- Let Gravity Help: If you are pouring glaze on a larger piece start at the top and let the glaze run down the sides and back into the bucket. If you are pouring the glaze onto the exterior of a pot you can turn the pot upside down to avoid pouring some inside the pot.
- Large pots: if your pot is too big to hold with one hand, you may be able suspend it above the glaze bucket on a few strips of wood or a grate.
See more / buy at Amazon (affiliate links).


Pouring and dipping are often used together. Glaze can be poured into a pot to coat the interior and then poured out. The pot can then be dipped into a glaze to cover the exterior surface.
Spraying Glaze on Pottery
For those looking to create unique textures or glaze combinations, spraying is an excellent option. It offers great control over application and can yield spectacular effects. It is also convenient for larger pieces.

Here are a few pointers:
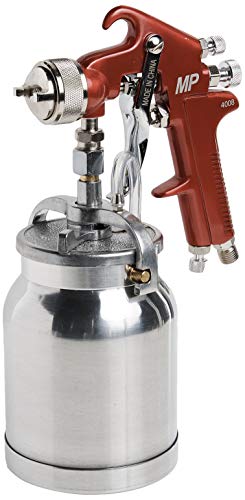
- Use the Right Equipment: A spray gun works best for this method. Make sure to thin your glaze according to the manufacturer’s recommendations for optimal spraying. Check that your air compressor meets the requirements of the spray gun to provide continuous, even spraying.
- Practice Your Technique: Start with a practice piece to get used to the spray pattern. A controlled, even motion is key to preventing drips and uneven coverage. Some spray guns can be adjusted to increase or decrease the flow of glaze or the width of the spray.
- Safety First: Be sure to use a proper mask and work in a well ventilated area while you are spraying glazes.
Cheaper option: If you don’t want to invest in a spray gun and air compressor you can get an atomizer. This device lets you blow glaze through a metal tube to spray glaze onto a pot. There are some inexpensive options available at Amazon that come in different sizes (affiliate link).

See more / buy at Amazon (affiliate links).


Spraying glazes can create some really interesting effects, especially when glazes are layered over one another. I love to spray glazes on large pieces with a lot of surface area to create interesting combinations.
Glaze Firing
Firing glaze onto your pottery is just as important as choosing and applying the glaze.
Understanding Firing Temperatures
Firing temperatures can greatly impact the final appearance and functionality of your glazed pieces. Different types of glazes require specific temperature ranges:
- Low-fire Glazes: Typically fired between 1820°F to 1940°F (995°C to 1060°C), these are vibrant and ideal for decorative pieces but may not be as durable as higher fired pots.
- Cone 6 Glazes: Fired around 2232°F (1230°C), these are popular for functional pieces due to their durability and varied color range.
- High-fire Glazes: Ranging from 2185°F to 2381°F (1200°C to 1300°C), these are strong and provide unique effects, perfect for functional ware.
Knowing the firing temperature required for your specific materials is essential! I’ve had great success with cone 6 glazes, which provide better durability than low fire pots but more color options and less energy consumption than high fired pots.

Kiln Firing Process
After applying your glaze, the next step is firing your pots in a kiln. This process transforms the raw glaze into a glassy, durable surface. Here’s a brief overview of how it works:
Load the Kiln
Arrange your glazed pieces carefully inside the kiln. Ensure they are not touching, as they will be stuck together after they are fired. Also, make sure no glazed surface is touching a kiln shelf or kiln post.
Set the Firing Schedule
Most kiln manufacturers have default firing schedules for their kilns. You may also find other firing schedules online or in books about glazes or firing. Be sure to set the final temperature or cone number so it matches your glazes.
Fire the Kiln
The firing usually involves multiple stages. A ramp-up phase increases the temperature, sometimes at varying rates. A soak phase holds the temperature steady for a certain amount of time. The cooling phase is where the kiln cools down. Cooling rate can be slowed down to give some glazes a different look.
Let the Pots Cool
The rate of cooling can affect the look of certain glazes. Make sure the kiln is cool enough before opening the lid or doors to avoid injury or damage to pots. Some potters make sure the kiln is less than 200 degrees Farenheit to be safe.

Opening the kiln and unloading the pots can be a very exciting time. It is often compared to Christmas morning since it is a little like opening presents. I love to open the kiln and “see what I got” because sometimes there are some great surprises. (shirt link)
But sometimes the results are not as expected. Don’t worry! This is the time to learn what can be done to improve results.
Troubleshooting Glaze Issues
Sometimes glazes just don’t turn out how we expect them to. But sometimes we get some major glaze faults which can cause problems for functional pottery.
Common Glaze Problems
Even the most experienced potters can encounter glazing issues from time to time. There are so many variables which make it difficult to get perfect results from every firing. Here are some common glazing problems you might face:
Crawling
This occurs when the glaze pulls away from certain spots, leaving bare patches on the pottery. It can be due to wax or oil on the surface before glazing or glaze that has cracked as it dried from being applied too thick, composition of the glaze recipe, or glaze that wasn’t mixed well. This isn’t always a glaze defect. Some glazes, often referred to as crawl glazes, are formulated to crawl when fired to create a textured surface on the pot.
Blistering and Pinholes
These are small bubbles that form on the glaze surface during firing, often caused by trapping gasses in the glaze.
Crazing
Thin cracks appear in the fired glaze because it has a lower thermal expansion than the clay body. If you have mixed the glaze yourself, adjust the recipe to lower the thermal expansion. If you are using a commercial glaze you can try it on a different clay or find a different glaze.
Shivering
Glaze starts to fall off the pot because it has a thermal expansion that is too high for the clay body. If possible, adjust the glaze recipe to raise the thermal expansion of the glaze. If you used a pre-mixed glaze, try a different clay or different glaze.
Running
Glaze running down the piece may ruin the look you had in mind, often resulting from a glaze that’s too fluid or firing to a higher temperature than it was designed for. If you mixed it from a recipe you could try lowering the amount of flux. Be sure your firing temperature matches the glaze. Running glazes aren’t always a problem. Some glazes were designed to move when fired and can create very interesting surfaces.
Lack of Shine
A dull glaze finish can often result from improper firing, using the wrong type of glaze, or applying the glaze too thin. Less glossy glaze surfaces aren’t always considered a problem. Some glazes are designed to have a matte or satin finish for aesthetic purposes.

Tips for Avoiding Glaze Defects
Fortunately, many glazing problems can be fixed or avoided. Here are some tips:
- Make Sure Surfaces are Clean: Always ensure your pieces are free from dust, grease, and fingerprints before glazing to prevent crawling or uneven glaze application.
- Modify Glaze Recipes: Adjusting the glaze formula can change its behavior during firing. This could include raising or lowering the thermal expansion so glaze fits the clay body better. You could also add or remove flux to make a glaze run more or less during firing.
- Check the Specific Gravity: This is a measurement of the ratio of powdered materials to water, basically how thick or thin is the liquid glaze? Finding the proper specific gravity for the glaze is important to apply the glaze properly to the pot. Glazes can also be flocculated or deflocculated to improve application.
- Test Pieces: Create small test tiles with different glaze combinations and firing temperatures to see how they behave before committing to larger pieces.
- Firing Adjustments: If you encounter blistering, reviewing the firing schedule can help. Double check that the kiln is correctly calibrated and test the heat work with pyrometric cones.
- Mix and Sieve: Mix your glaze well. A larger amount of glaze can be mixed with a paint mixer attachment on an electric drill. Glazes that you have mixed yourself or that have been around a while could benefit from being pushed through a sieve.
Every potter faces challenges along the way, but overcoming these obstacles can enhance your skills and deepen your understanding of the glazing process. Learning from mistakes as part of the learning journey is one thing that makes creating pottery so rewarding.
Experimenting with Glazing
Once you’ve mastered the basics of glazing pottery, it’s time to get creative! You can experiment and try new things to extend your knowledge and visual range.

Try a new technique, add some texture, or combine glazes in different ways to give your pots a unique look.
Creating Textures with Glaze
One exciting avenue is adding texture. Glazing pottery allows for a plethora of tactile effects. Implied texture can enhancing the visual appeal of your pottery while real texture can add a new surface that you can actually feel with your hand. Here are some techniques to consider:
- Adding Materials: Incorporate sand or glass into your glaze to create interesting surfaces. For instance, adding fine sand can give a gritty texture that mimics natural stone.
- Using Texture Tools: Experiment with tools like sponges, brushes, or even textiles to apply glaze. A sponge can create soft, organic patterns, while a bristle brush can leave beautiful brush marks in the glaze. A comb or ridged texture tool or even a finger can be wiped over a freshly glazed pot to remove some of the glaze and leave an interesting pattern.
- Engobes and Underglazes: Applying a colored slip (engobe) or a pattern of underglaze before glazing can introduce texture and color that interacts beautifully with your glaze.
- Textured Clay: Don’t forget to accentuate the real texture of your clay. A semi transparent colored glaze such as a celadon could pool just enough in the low parts of the texture to make it darker and emphasize the look of the texture.
See more / buy at Amazon (affiliate links).


Combining Glazes for Unique Effects
Layering glazes is another popular technique to achieve unique outcomes. This technique allows potters to blend different colors, resulting in stunning depth and complexity. Here are some tips:
- Choose Compatible Glazes: Not all glazes play well together, so it’s essential to test combinations to see how they react. Small test tiles are recommended for experimenting. Try glaze A over glaze B and then glaze B over glaze A. Sometimes it can make a difference.
- Apply in Thin Layers: Start with a base layer, allowing it to dry before applying the next glaze. Don’t make the layers too thick, especially if you are using multiple glazes. If brushing on commercial glazes you can try a different number of layers for each glaze. How would two layers of the top glaze and one layer of the bottom glaze look different than one of the top glaze over two of the bottom glaze?
- Experiment with Sheen: Try combining glossy glazes with matte glazes. The contrast can create engaging visual dynamics.
- High Flux Glazes: Some glazes move a lot when they are fired. These can be applied over another glaze, usually at the very top of a pot. When fired, these glazes will run down the pot and create interesting colors and combinations.
- Find a Community: Combining glazes is quite common. There are groups on social media that focus solely on commercial glaze combinations. Some glaze manufacturers have published combinations of their glazes to give you some ideas to start.
Combining glazes in different ways can really give your pottery a unique look.
Specialty Glazes
There are many specialty glazes, firing techniques, and combinations that can really add some visual interest to your pots. Here are a few specialty glaze that can be explored:
- Shino Glaze Traditionally, white or creamy in color, but can also be found in red and orange varieties. Shino glazes have a thick, opaque finish with occasional pinholes, crawling, and carbon trapping.
- Crawling Glaze Intentionally creates areas where the glaze retracts or “crawls” away from the pottery, forming bare clay patches.
- Crystalline Glaze Known for the growth of crystals in the glaze during the cooling phase of firing, resulting in distinctive and intricate patterns. These are often fired in electric kilns which make it easy to control the temperature as the pots cool.
- Lustre Glaze Offers a metallic sheen and can produce iridescent and pearlescent effects on decorative pieces. Made with metallic solutions applied over a fired glaze.
- Ash Glaze Made from wood or plant ash, which melts into a glass-like coating on the pottery. The colors can range from soft greens and blues to browns, depending on the ash and firing conditions.
- Temmoku Glaze Rich, glossy, and ranging from dark brown to black, often with a rust-like appearance. Can also display subtle hints of blue or green.
- Chun Glaze (Jun Glaze) Known for its opalescent blue to lavender hues, Chun glazes are fluid and often pool into thicker areas revealing varying degrees of color intensity.

Many of these glazes are originally high fire reduction glazes with long histories but many also have mid fire versions with similar effects that can be achieved in an electric kiln.
Advanced Firing Techniques
After mastering glaze firing in standard oxidation or reduction environments of a kiln, you can expand your glazing skills with some new firing techniques. Here are some additional ways to fire your glazed pottery:
- Raku Firing: A low-temperature, rapid firing where pots are removed from the kiln while hot and placed into a container with combustible materials. This technique is known for distinctive crackled glazes and metallic finishes but requires certain clays and glazes to achieve the best results.
- Soda Firing: Soda ash (sodium carbonate) is added to the kiln at the top temperatures, which melts and creates a range of smooth, glossy surfaces with subtle variations in color and texture.
- Salt Firing: Salt is added to the kiln at high temperatures, where it vaporizes and reacts with silica in the clay body to form a glassy sodium silicate surface. This technique is known for glossy, orange-peel textures and variations in color that depend on the clay’s composition and the kiln’s atmosphere.
- Wood Firing: This ancient technique uses wood as the fuel source for the kiln. Wood ash lands on the pottery and melts into a natural glaze resulting in earthy colors and unpredictable textures.

These different firing techniques offer great possibilities but also require larger investments. Many of these firings are often events that involve multiple members of the pottery community.
How to Glaze Pottery Safely
Precautions while Handling Glazes
When working with pottery glazes, it’s crucial to acknowledge that some glazes may contain harmful substances. To ensure safety, here are some important practices for handling glazes:
- Read Labels Thoroughly: Always check for safety warnings on glaze packaging. Look for phrases indicating toxicity, and follow handling guidelines.
- Dispose of Old Glazes Properly: Most materials used to make glazes actually come from the ground. But that doesn’t mean you want these materials right outside your door. Glazes don’t often go bad but if you can’t use all of a glaze for some reason, find a place where you can dispose of the glaze material safely.
- Know Emergency Procedures: Familiarize yourself with emergency protocols, including the first aid measures in case of accidental contact with chemicals.
Protecting Yourself
Take your own health into consideration as you mix and apply glaze to pots. Here are some ways to avoid contact with glazes, especially if they contain harmful ingredients.
- Use a Mask: If you’re working with powdered glazes, wearing a good mask can protect you from inhaling harmful particles which can really damage your lungs.
- Wear Protective Gear: Aprons, gloves, and safety goggles can prevent accidents, spills, and splashes from becoming problems when working with liquid glazes.
See more / buy at Amazon (affiliate links).


Glaze in a Safe Environment
Taking care of the area around you can make glazing pottery safer and more efficient.
- Work in Well-Ventilated Areas: Whether applying glazes or mixing them, make sure you’re in a space with good ventilation to disperse any fumes or dust.
- Keep The Glaze Area Clean: An organized work area reduces the risk of mistakes or accidents. It also allows you to navigate your space effortlessly while focusing on glazing.
Taking these precautions not only protects your well-being but also allows you to enjoy glazing with peace of mind. As every potter knows, a safe workspace is a happy workspace, and by prioritizing safety, you can fully focus on the joy of creating beautiful pottery!
Cleaning and Maintenance
Cleaning Glaze Tools
Maintaining clean glaze tools is essential for ensuring consistent results in your pottery work. Dirty tools can lead to cross-contamination of colors or undesirable effects. Here are some tips for effectively cleaning your glaze tools:
- Rinse Immediately: After using brushes, sponges, or spray guns, rinse them right away to prevent the glaze from drying and hardening on the surfaces.
- Use Appropriate Cleaners: For brushes, a gentle soap and warm water are generally sufficient. Avoid harsh chemicals that could damage the bristles. Soap and water or a general cleaning product should work well for cleaning work surfaces, measuring devices, application tools and equipment and anything else that comes into contact with glaze.
- Check for Residue: Pay close attention to the bases of brushes or any textured tools, as residual glaze can build up and affect future applications. Also make sure surfaces don’t have a cloudy residue left where glaze has not been completely removed.
- Dry Properly: After cleaning, allow tools to air dry completely before storing them. This helps prevent mold growth or rust and keeps them in good condition.
From my experience, taking the time to clean up immediately during glazing sessions saves a lot of time and effort later on. Learn more about glaze tools for pottery.
Storing Glazes
Proper storage of glazes is crucial. If glazes aren’t stored correctly, they can dry out or become unusable. Here’s how to store them effectively:
- Use Sealed Containers: Invest in airtight containers to keep moisture out and prevent crusting. Label each container with the glaze type, date, and firing temperature.
- Keep Away from Sunlight: Store glazes in a cool, dark place to protect them from UV exposure, which can alter their color and consistency.
- Stir Before Use: Glazes can settle over time, so always stir them thoroughly before applying. If a glaze looks separated, don’t worry; just give it a good mix!
Pottery Glazing Resources
There are many great resources to help you learn how to glaze pottery, including formulating, mixing, applying, firing, and experimenting with glazes. Here are some of my favorite resources:
Books about Pottery Glaze
See more / buy at Amazon (affiliate links).


Online Resources about Pottery Glaze
Here are some great websites to enhance your glaze knowledge and skills.
DigitalFire
This is an amazing pottery resource with detailed information about glaze ingredients, glaze recipes, and plenty of technical information about using clay and glazes. You can also find DigitalFire Insight software, a subscription based glaze chemistry calculation program.
Glazy
A free, user supported site full of glaze recipes with some great tools for studying and experimenting with glazes.
Ceramic Arts Network
Here you can find a forum about Clay and Glaze Chemistry.
Now You Know How To Glaze Pottery, Get Glazing!
Navigating the world of pottery glazing can seem overwhelming at first, but with practice and reflection, it can become an exciting journey of creativity.
Remember, every piece you create is a step toward becoming a better potter. Enjoy the process, celebrate your successes, and learn from any mishaps. Happy glazing!
This article is part of the Pottery Making Guide.
About Brandon “Fuzzy” Schwartz
Brandon is a potter and teacher interested in making websites, videos, and articles about pottery and ceramics. Expert Clay, YouTube, Art by Fuzzy
More great pottery content:


